(Administrator and Group/Partner logins)
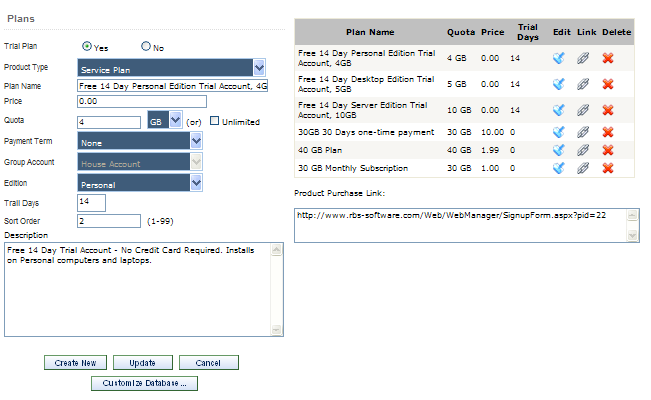
Use the Plans Setup screen to define your Service Plans. The list of defined plans appears on the right. Click the Edit button to edit a plan, hover over the Link button to display the Purchase Link, and select the Delete button to delete a Plan.
Plans appear on the Buy Now page, and a direct link to the Order Form for this plan is generated that can be placed on other web sites.
Trial Plan - Select "Yes" if this is a trial plan.
Product Type - Select Service Plan if this is a Remote Backup Service Plan. Otherwise select Product or Service.
Plan Name - Give your Plan a name.
Price - Give your plan a price.
Quota - Give your plan a disk space quota, or set it to Unlimited. This setting will trigger the Over Quota Email notification, and may stop backup sessions depending on other settings. Trial Plans are limited by your RBS license to specific maximum space.
Payment Term - If you select None, this will be a one-time charge that will not recur. Selecting any other option turns on Automatic Recurring Billing. For more information see Payment Gateway Setup.
Group - Select the Group to which to assign Endpoints who have this Plan.
Edition - Select the Client Edition (Server, Desktop, Personal) to use with this Plan.
Trial Days - If this is a Trial plan, select the number of days to allow for the Trial account. Trial Days are limited by your RBS license to a specific maximum.
Sort Order - The order that this plan appears on the Buy Now Page.
Description - The description of this plan as it appears on the Buy Now Page and the Order Form.
Product Purchase Link - Move the cursor over the Link button for each plan to display its product purchase link. You can also click the Link button to display the Order Form. This URL can be placed on other web sites or sent in an Email.
Create New Button - Select this button to create a new Plan.
Update Button - Select this button to update an existing Plan.
The Customize Database Button
Press the Customize Database button to edit more advanced features for this Plan.
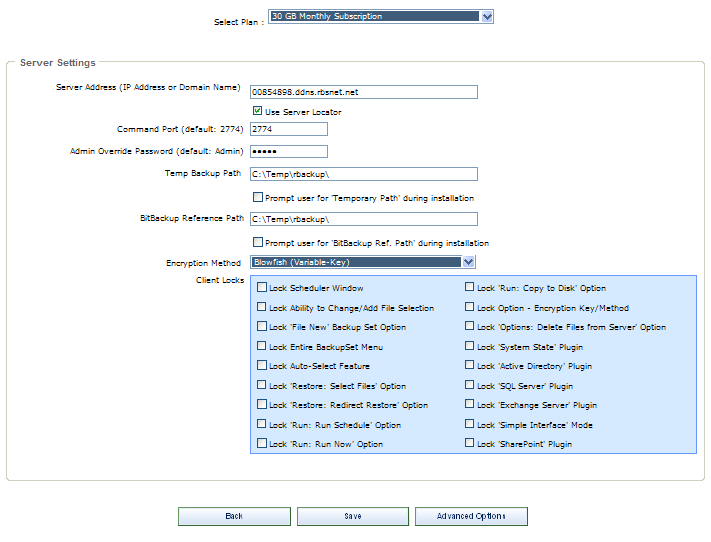
Select Plan - (Normally do not change this.) This will default to the currently selected plan.
RBS Server IP Address - (Normally do not change this. It may have been set elsewhere.) Enter the RBS Server's IP Address or Domain Name here. If you select Use Server Locator, your Server Locator Host Name will automatically be entered here. Your Server Locator Host Name is your serial number + ".ddns.rbsnet.net" like this:
12345678.ddns.rbsnet.net
Read more about the Server Locator here.
You can enter as many as 32 IP addresses or Domain Names here representing 32 RBS Servers, separated with semicolons, as long as the total length of the input does not exceed 255 characters. The Client software will try the Servers in sequence until one of them answers. This is useful if you have two mirrored RBS Servers operating as fail-overs, or multiple RBS Servers sharing a common drive:
server1.domain.com;server2.domain.com;myfailover.com
In the Evaluation version, enter your RBS Server's PUBLIC IP ADDRESS here to create clients that can connect from OUTSIDE your network. Enter its PRIVATE IP ADDRESS to create clients that can connect from INSIDE your network.
What's my Public IP Address? - You can see your Public IP Address on the RBS Web Site. Go to http://remote-backup.com/support/
Admin Override Password (Normally do not change this. It may have been set elsewhere.) - Some features of the Remote Backup Client can be changed on the Client software itself after entering an override password. Pick your override password and enter it here. Please note that this is CASE-SENSITIVE. This password is used at the Client to change Administrator's features. See the RBS Server's Help File - Client Administrator's Override for more information.
Temp Backup Path - (Normally do not change this. It may have been set elsewhere.) This is the location on the Client's hard drive where temporary files are stored during backup processing.
BitBackup Reference Path - (Normally do not change this. It may have been set elsewhere.) The location of the BitBackup Data Store. BitBackup stores a copy of all the files selected for backup using the BitBackup method (on the Schedule Screen). The space required for this storage space is the total native file size of all files for which BitBackup has been selected.
Encryption Method - Select the default encryption method. You can select from seven types: Two kinds of DES, Triple DES, Blowfish 448-bits, AES 128-bits, AES 192-bits, and AES 256-bits.
Client Locks - You can lock out certain features of the Client software, preventing end Endpoints from using them. For example, if you don't want clients to be able to change backup schedules or change file selections, select Lock Scheduler Window and Lock Ability to Change/Add File Selection.
Client Locks are useful when you want to distribute a pre set-up version of the Client software with few options. This allows you to better control your costs and reduce support issues associated with users who might misconfigure the software.