(E-Commerce PlugIn only, Administrator and Partner logins)
This section is used to set up your Payment Gateways in the E-Commerce PlugIn. The Payment Gateways supported by the PlugIn are listed on the right. There may be different Gateways in your version of the PlugIn than in this example.
This is where you tell the E-Commerce PlugIn how to accept payments, and what payment options to offer your customers. You can accept payments from credit cards and debit cards (in some countries,) PayPal (in some countries,) and direct billing.
Note: You must have Payment Gateway account(s) with your Payment Processor(s) (authorize.net, PayPal, etc.) to process payments automatically. The E-Commerce PlugIn has built in APIs for some Payment Processors, and two built-in Payment Gateways that do not require a Payment Processor.
Attaching the E-Commerce PlugIn to your automatic Payment Processing Account requires advanced knowledge of online payment processing, and may require selecting specific options in your Payment Processing Account. Contact your Payment Processor for help.
PLEASE NOTE: RBS cannot help you set up your Payment Processing Account(s). If you are applying for a new Payment Processing account, we recommend authorize.net if is available to you.
Only one credit/debit card gateway can be active.
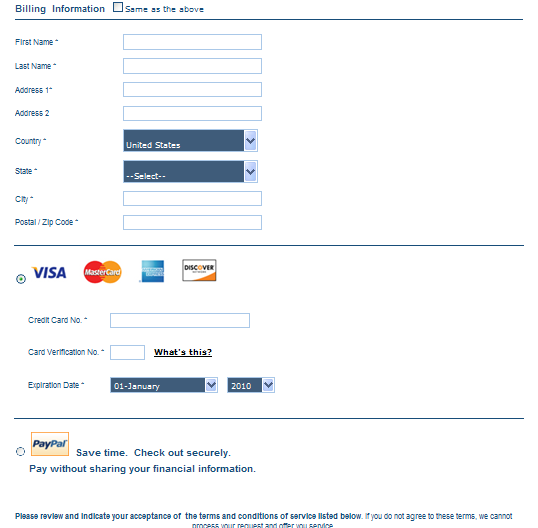
The gateways that you set as "Active" show up on the Payment section of the Order Form. In this example of the Order Form we have selected the Payflow Pro and PayPal gateways. Customers can select either payment method.
Define your Payment Gateway options here.

Account Name - Give your Payment Account a name.
Gateway Name - Select the Payment Gateway from the list of pre-programmed interfaces.
Login ID - Enter the login ID of your Gateway account (from your payment processor)
Login Password - Enter the login password of your Gateway account (from your payment processor)
Transaction Param - Enter the Transaction Parameters code (if any) given to you by your payment processor.
Vendor - If required, enter the Vendor ID (from your payment processor)
Partner - If required, enter your Partner ID (from your payment processor)
Currency - Select the currency in which to accept payments.
Test Mode - If selected, transactions will be approved by the PlugIn, but not processed through the Payment Processor.
Is CVV required? - Select to require customers to enter the CVV code. (Check with your Payment Processor.)
Use this gateway? - Select to activate this gateway. Note that only one credit/debit card gateway can be active.
Create New - Select to create a new Payment Gateway.
Update - Select to update an existing Payment Gateway.
Offline Processing Payment Gateway
The built-in Offline Processing Gateway is for use with Payment Processors not supported automatically by the E-Commerce PlugIn, and when you want to process your credit/debit card payments manually.
When the Offline Processing Gateway is selected the credit card payment section appears on the Order Form.
All credit cards with valid numbers (according to their embedded self-validating checksums) and valid dates are approved. Software is deployed and backup accounts are created and activated. Entries are made in the Orders worksheet. New User Welcome Email notifications are sent to the customer.
The PlugIn does not validate credit card numbers or contact Payment Processors.
Customers can use their accounts immediately.
As the Service Provider, you may suspend accounts any time at your discretion.
The New User notification Email is sent (usually to the Service Provider or the Group Manager.) Following is an example of a typical New User notification Email. You can edit this template in Email Notifications.
In the below example, note that the partial credit card number (CC Number) is included.
To remain compliant with the rules governing the use of credit card numbers by merchants, the E-Commerce PlugIn never sends the complete credit card number in an Email, nor does it store the complete credit card number with the CVV code and date or display it online in a web page.
CC Number:=XXXX11111111XXXX

Instead, the E-Commerce PlugIn sends the middle eight characters of the credit card number in an email, and stores the rest of the number in its database, which displays in the Orders worksheet:
To process a credit card payment manually, reconstitute the credit card number from the Email and the Orders worksheet, and charge it manually using your manual or virtual credit card terminal. If you are going to recur billing for this account, set that up manually, too.
If the charge is approved, enter the Authorization Code (Auth Code) in the Orders worksheet, select the Paid checkbox, and select the Update button to mark the order as Processed.
Transactions are clearly marked as Paid or not Paid in the Orders worksheet.
Note: For testing purposes, the Offline Processing Gateway always approves a transaction using the following credit card information:
Card Number: 4111111111111111
CVV Code: Any 3 Digit Number
Date: Any date beyond today's date

Bill Me Payment Gateway
The built-in Bill Me Gateway is for use when you want to offer to bill your customers directly.
When the Bill Me Gateway is selected a Bill Me choice appears on the Order Form.
All orders are approved. Software is deployed and backup accounts are created and activated. Entries are made in the Orders worksheet. New User Welcome Email notifications are sent to the customer.
Customers can use their accounts immediately.
As the Service Provider, you may suspend accounts any time at your discretion.
The New User notification Email is sent (usually to the Service Provider or the Group Manager.)
Configuration of the Bill Me Payment Gateway is slightly different from the other gateways.
The text entered in the Transaction Param field will be displayed on the Order Form with the Account Name. Use this field to give your customers special instructions.

Recurring Billing
The E-Commerce PlugIn can set up automated recurring billing through Payment Processors that support this feature. You can turn on recurring billing for individual Service Plans at the Plans screen by selecting a Payment Term.
If the customer pays through a Payment Gateway attached to an automated Payment Processor, his credit card will be charged on the renewal date of his subscription, as defined by the Payment Term you select. (Your Payment Processing account must support Recurring Billing.)
At the time of the order the E-Commerce PlugIn instructs your Payment Processor to automatically charge a customer's credit card or PayPal account on the Payment Term defined in the Plans screen.
It is important to note that the Payment Processor performs the automated recurring billing - not the E-Commerce PlugIn. The E-Commerce PlugIn verifies the recurring payment and reports the result by issuing a query to the Payment Processor. You must log into your Payment Processing account to manage your recurring billing.